
Introduction
COVID-19 has upended many social norms, from safe distancing measures to mandatory face masks, but as we all know, laws and rules are only as effective if they can be enforced. There are more use cases surrounding the use of CCTV and IoT cameras to monitor safety and movements.
So what better way to demonstrate Datature's model building capabilities with a fun little weekend project building a face mask detection model 😷
Tutorial Recap
Let's recap with some step-by-step. At the end, you will be able to replicate this entire project in under 20 minutes. To get started, you'll first need the following:
- A Datature Nexus Account - Free Tier - Sign Up to get 300 minutes of complimentary GPU training minutes with 1000 images.
- Dataset - We'll be working with a Kaggle Dataset which you can download here.
Project Setup
Once you're logged in to the Nexus platform, you'll be prompted to create your first project, let's go ahead and call it "Face Mask Detection" - or feel free to name it anything else i.e SkyNet_Phase_1 (we're half kidding)
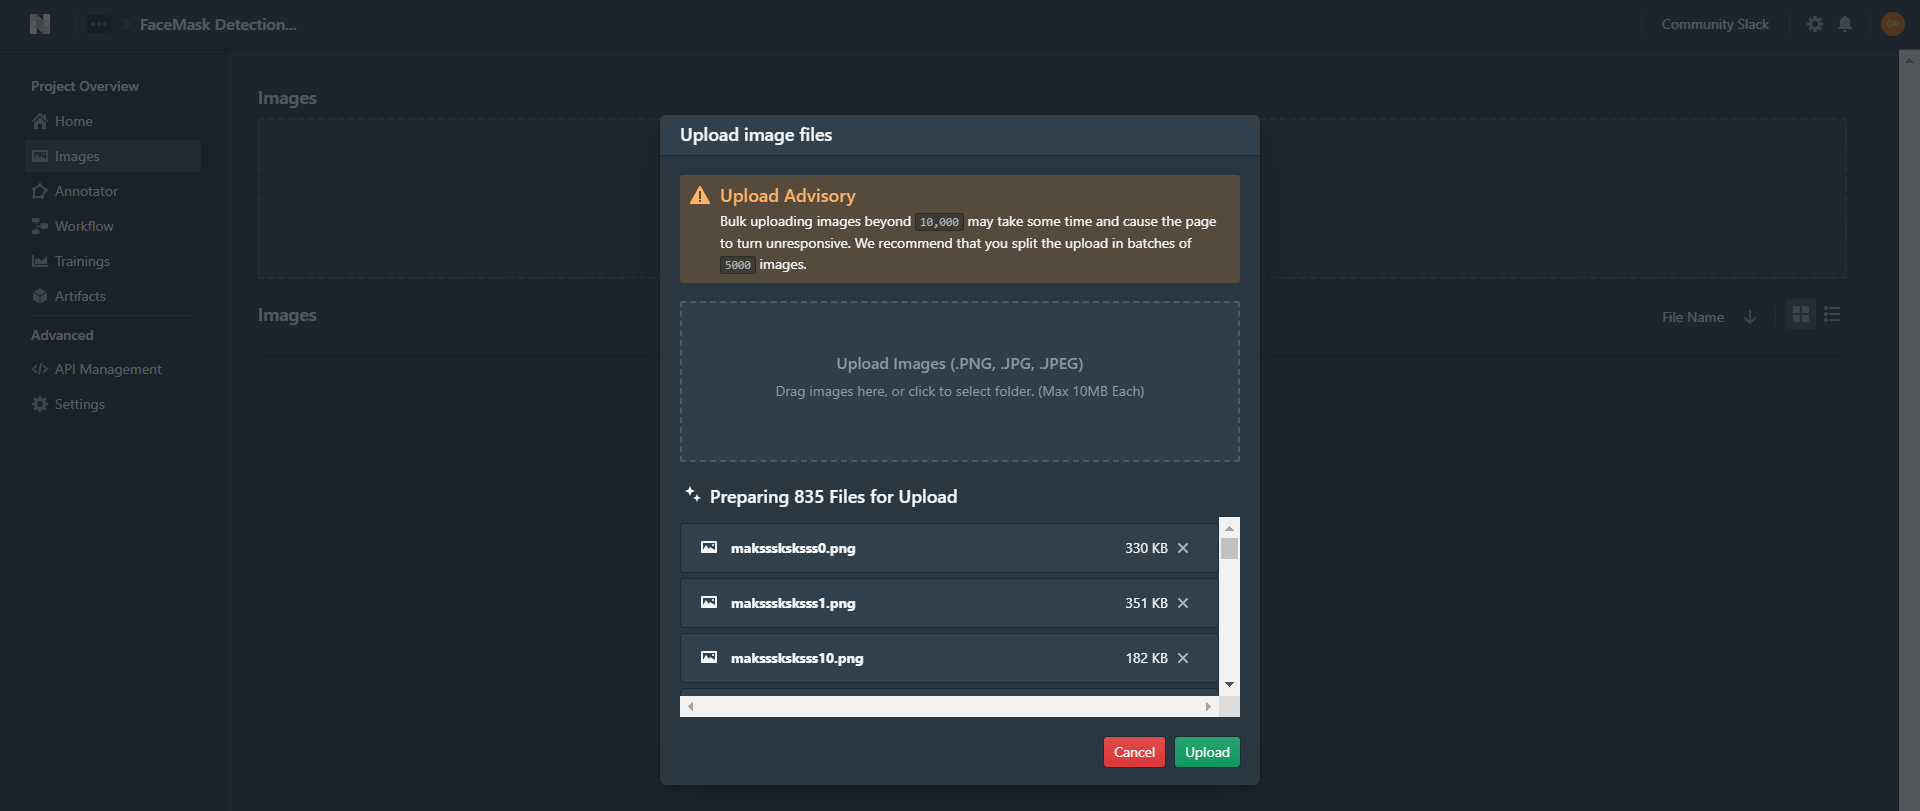
Images Upload
The first thing we want to do is to upload our image dataset. Go ahead and select the entire 'train' folder. You'll be prompted to upload all files in the folder and thumbnails will be generated shortly.
Annotation Upload
Next, instead of spending hours labelling our images, let's upload our annotations. The Kaggle dataset we downloaded comes with labels in the Pascal VOC format, so all we have to do is to upload all the .xml files.
Note: You can upload all the annotations without splitting them into train / test as our platform matches the labels to the filename of your images. This also means that filenames must match. For example, an image file named "image1.png" needs to have the accompanying annotation file name "image1.xml". This is usually done for you when you export labels from your favourite annotation tools.
Check out the full list of support annotation formats in our documentation here

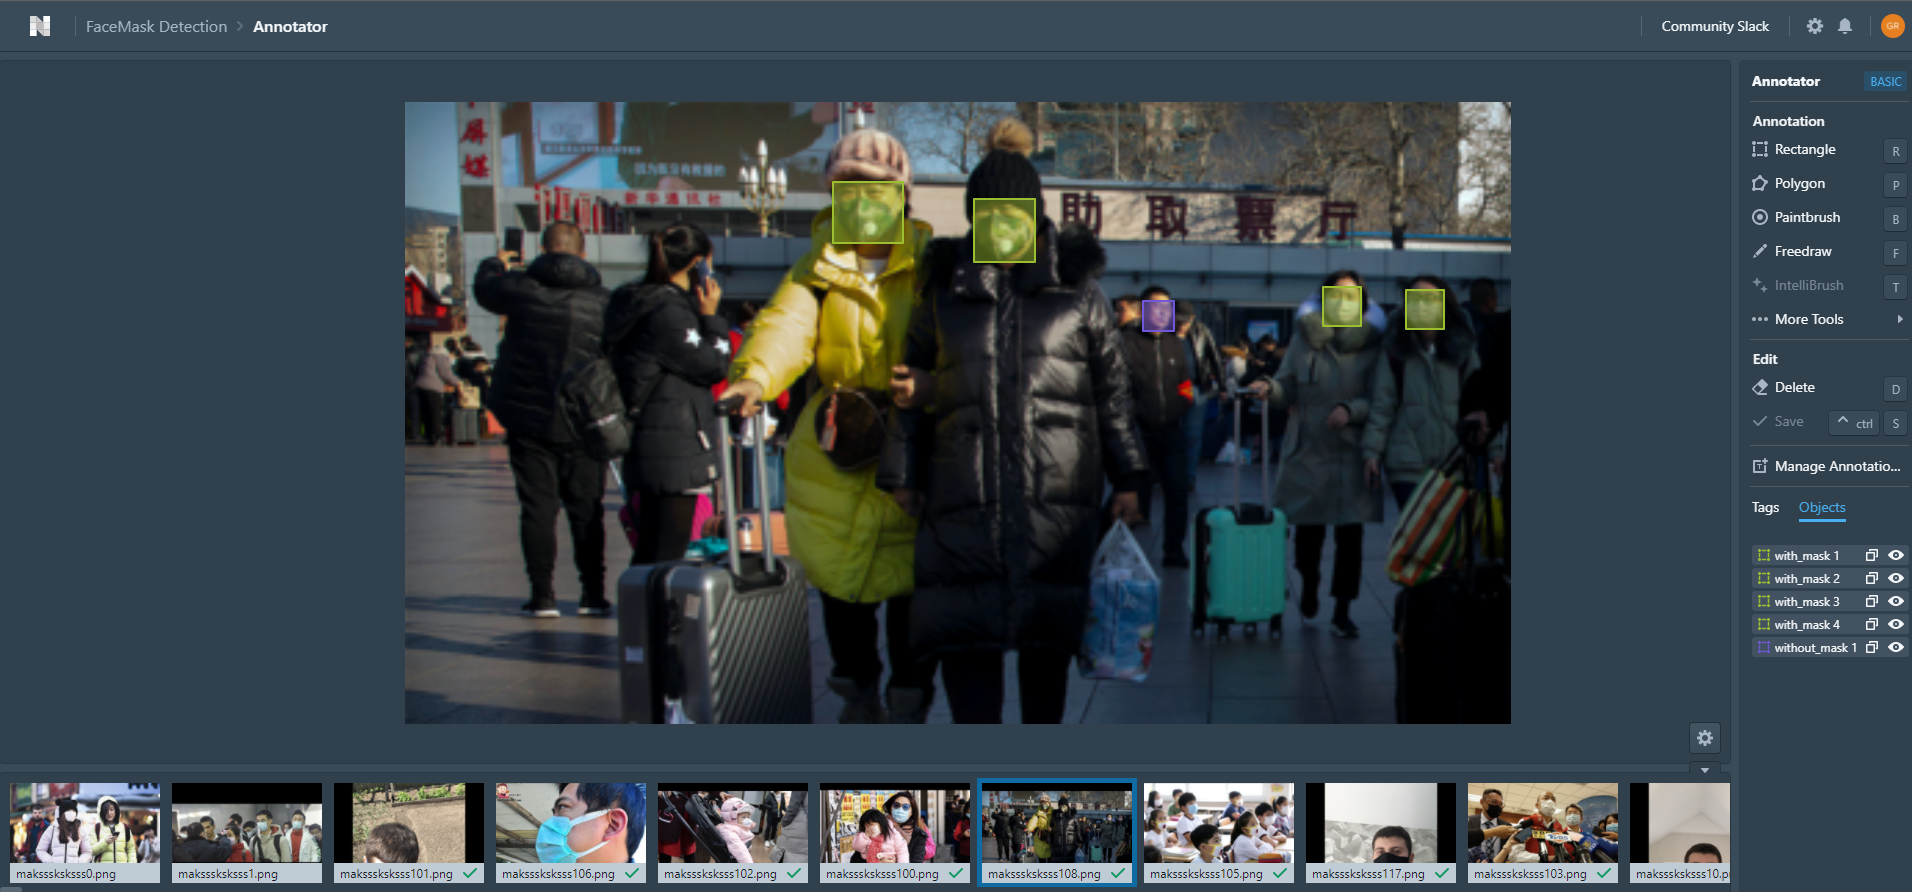
Inspecting Annotations
Next, its time to inspect our labels. There are 3 main classes in this dataset: with mask, without mask and mask worn incorrectly. You can always rename these classes as you wish by clicking 'Manage Annotation Tags on the Annotator's Menu Bar.
Next, head on over our built-in annotator where you'll be able to inspect labels and annotate any remaining images that might not have been labelled.
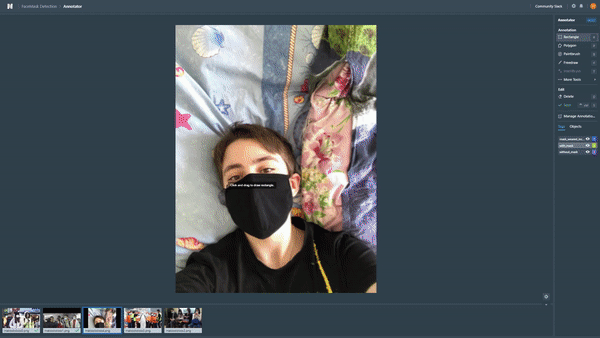
Data Labelling Tools
Even if you're on our Free Tier, you'll have access to comprehensive tools, such as -
Rectangle - For Drawing Bounding Boxes, Polygon - For Outlining Masks, Paintbrush - For Painting and Erasing Complex Polygons, Freedraw - For Directly Drawing the Outline of the Mask / Polygon
A full breakdown of our labelling tools can be found here.
Labelling Images
We're then going to label any remaining images that are missing annotations. I'm going to be drawing bounding boxes for all of the classes.
Did you know you can use hotkeys to speed up your labelling efficiency? Toggle between Rectangle (R), Classes (1,2,3..) and Brush (B). You can find the list of hotkeys by pressing '?' on your keyboard!
Building your Training Pipeline
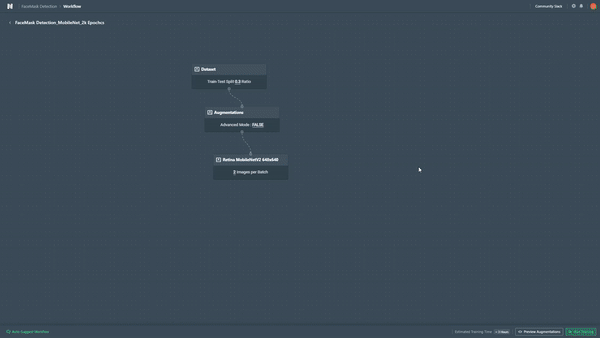
Now let's get to the fun bit; building your model training workflow. Create a new workflow and name it however you want. A practice we have is to name our workflow based on your selected model parameters i.e model title, model architecture, number of epochs, and applied augmentations. This helps a ton when we look back at our artifacts and wish to figure out the general configurations used.

Simply right click on the canvas and select the modules. A full workflow should consists of the Dataset, Augmentations and Model.
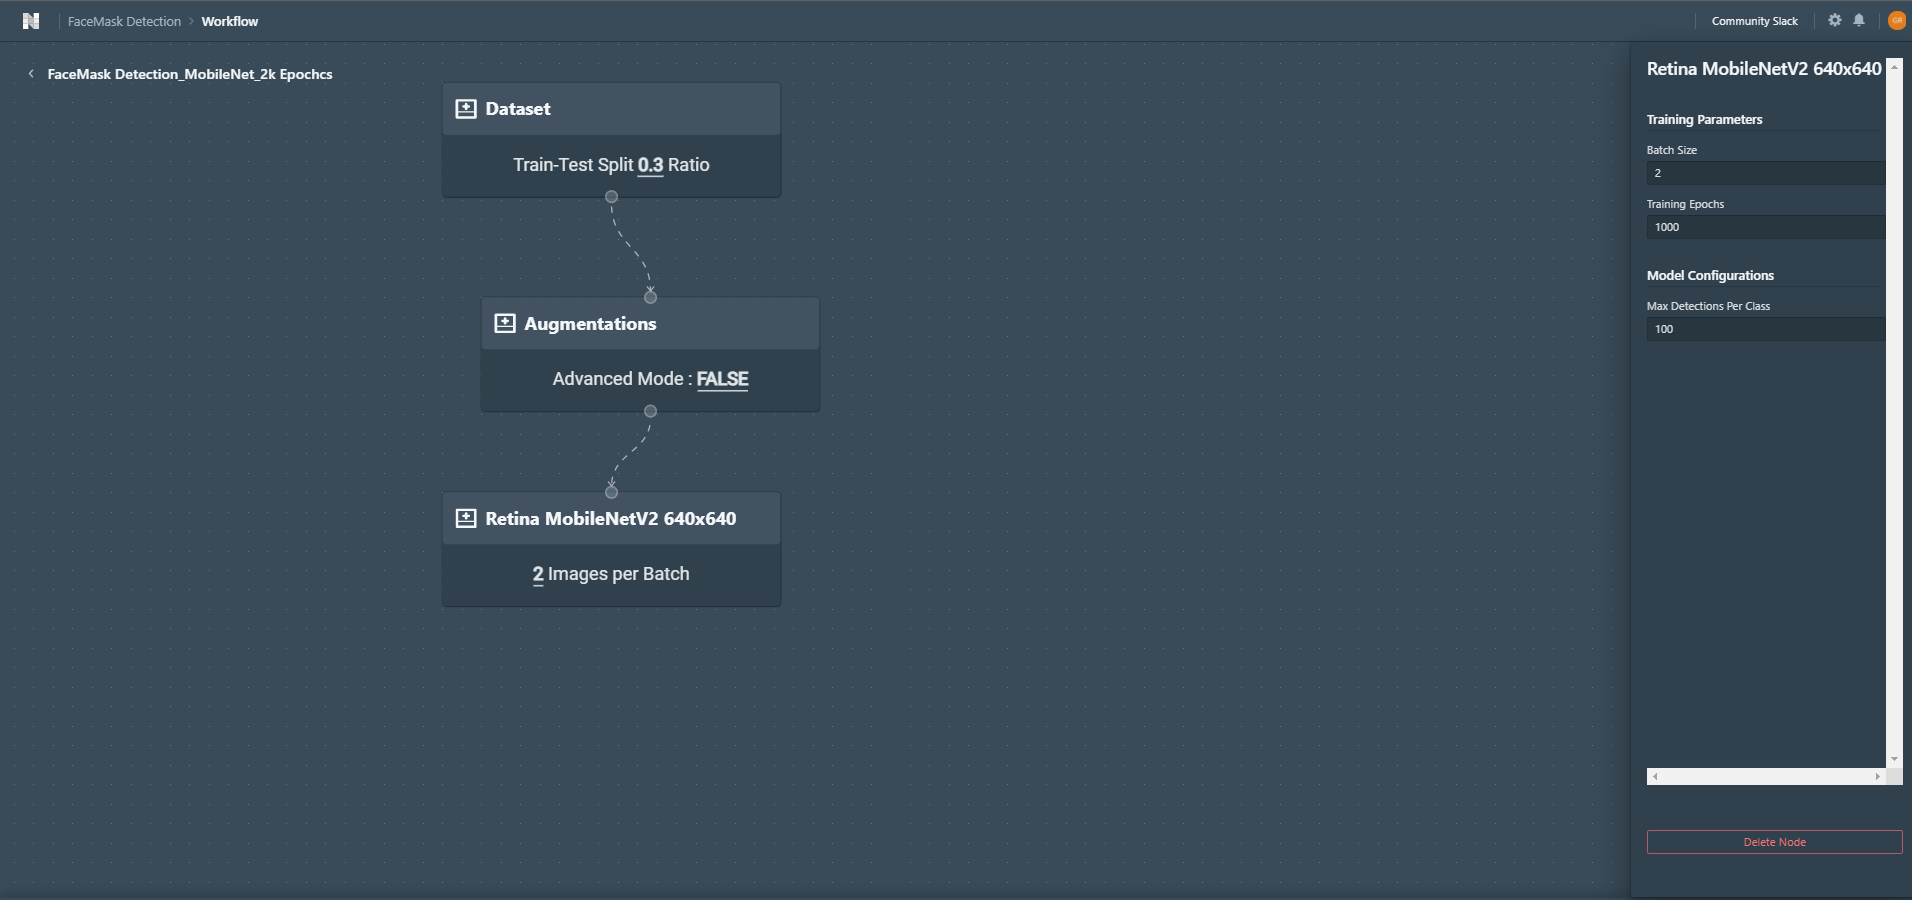
Dataset - Clicking on the card allows you to select your train-test split ratio as well as an option for you to shuffle your dataset.
Augmentations - This is where we select relevant augmentations as a pre-processing step to logically enhance our dataset on the fly to increase the ability to generalize on unseen variations. You may select as many augmentations (that make sense for your dataset or use case) by selecting the checkboxes. Toggling Advanced Mode will also enable you to enter the probability of each augmentation for users who like full control of their parameters. Our library of augmentations supports up to 30 augmentations ranging from positional (vertical / horizontal flips) to color space augmentations to account for variances in lighting conditions.
Model - This is where we select the base model architecture to train our model on. Datature utilizes state of the art model architectures for transfer learning so feel free to select the model for your use case as we understand that some users may or may not be willing to trade accuracy for computational complexity.
For this tutorial, we will be using the setup as shown above.
Previewing Augmentations
Now that all our modules have been set up and connected, let's go ahead and preview our augmentations.
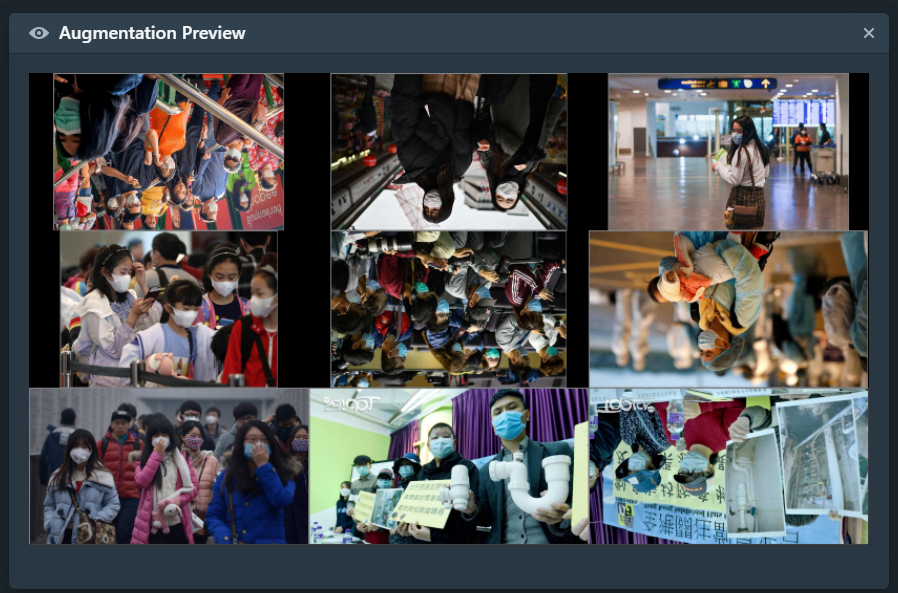
Click on Preview Augmentations at the bottom bar - this gives you a great way to see how these augmentations will be apply to your dataset and also allows you think about your data augmentation strategy.
Model Training
Once you're happy with your augmentations and workflow, selecting Run Training will provide you with a final configuration summary based on the parameters you've chosen. You'll also be able to specify the hardware acceleration and train your models on up to 8 GPUs.
The neural network will be initialized after you select Start Training.
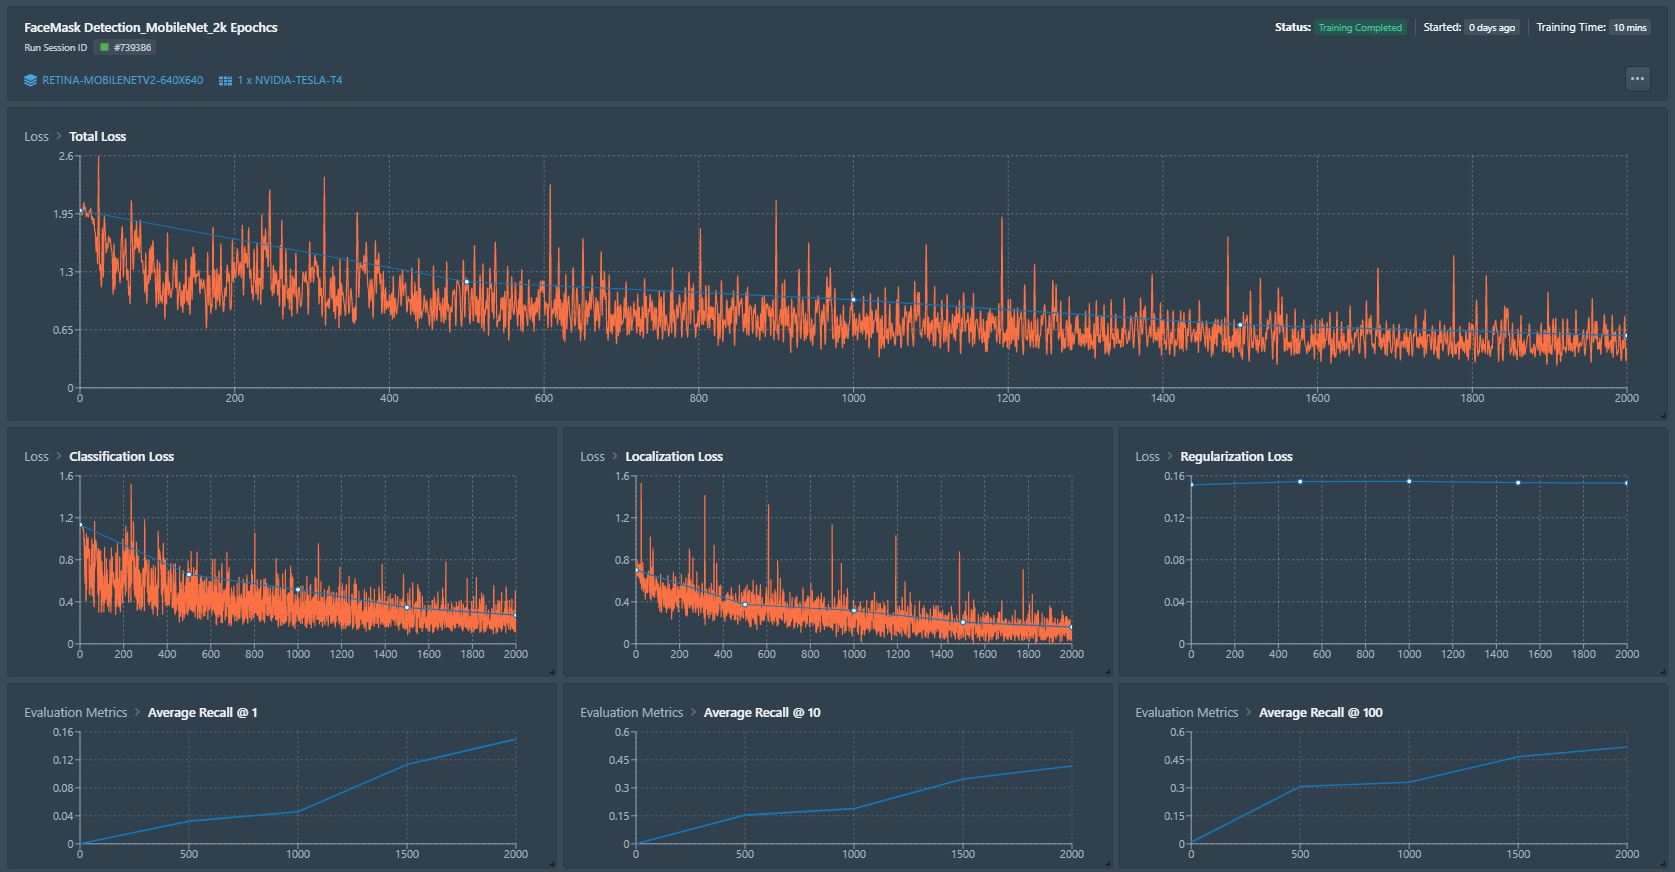
Model Monitoring
Now its time to sit back and monitor your model training in real-time. This is great for teams to spot early signs of overfitting which allows them to kill their trainings early.
Exporting Artifacts
Models trained on the Datature Nexus platform are stored as 'artifacts'. Let's go ahead and generate a TensorFlow models (with support for more models coming soon). This takes anywhere between 5 - 10 minutes and we can download the model to our afterwards.
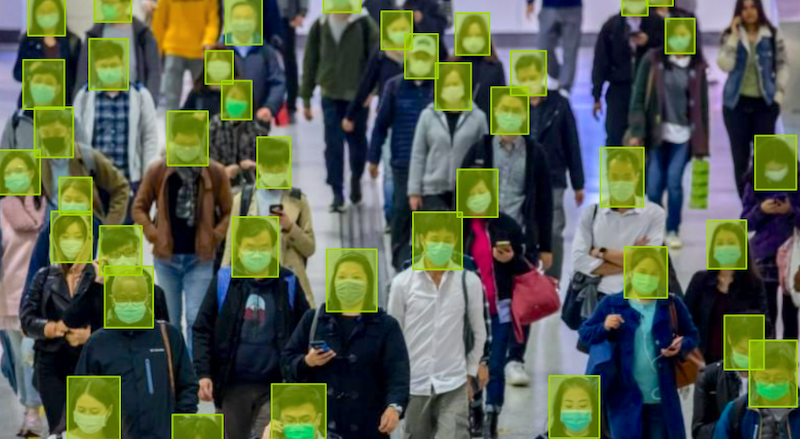
Inspecting Model Performance with Real Data and Videos
We've successfully trained our model...now what?
Its time to inspect our models visually! Even though we're able to track model performance from our training run, we've found it especially useful to inspect how our newly trained models are making inferences on new image and video data.
Our tool of choice - Portal. Our open-source library that lets anyone visualize inspect the performance of their model easily in minutes.
Visualizing Neural Networks with Datature Portal
Portal can be loaded as an executable file or can be run as a web application (more details on Github). Once Portal is successfully initialized, we'll want to load in our model. If you've downloaded your model locally, all you need to do is to entire the folder path. If you've trained your model on Datature Nexus, you'll also be able to enter in your model key (from the artifacts page) as well as your project secret (from your account settings page).
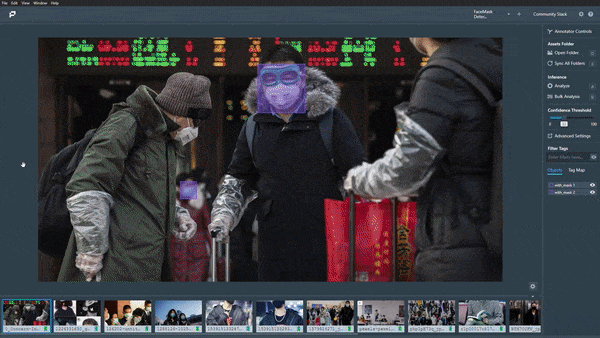
Once we've loaded in our model, we'll go ahead and load in sample images and videos from our 'test' dataset. Selecting Analyze on Portal initiates our loaded model to run an inference on the current asset to return any objects which we have labeled. There are a ton of other cool features on Portal like Confidence Thresholds, IoU, Class Filtering and Bulk Analysis, so head on over to our article Inspect Model Inferences on Images and Videos with Portal
Next Steps
Now that you've trained and visualized your model, it's time to improve on those edge cases you've identified like blue or black masks by adding more of such examples to our dataset. In addition, a simple analysis on our projects overview page also shows that there is a high class imbalance between the 3 classes and a possible improvement as a next step would be adding more data consisting of those classes.
And there we go! That concludes our tutorial on training a face mask detection model in under 20 minutes for you!
What are you going to build?
Now that you've seen the capabilities of the Datature and Portal platform, it's time to apply it to your own industry's use case! We've seen how some of Datature's users have developed computer vision use cases from defect detection models to automate assessment and grading fruits in their factories, to developing human traffic counters in retail stores.
The possibilities of computer vision are endless and whether you're developing a proof-of-concept model or fine-tuning model performance, our platform allows you to do it in a data-centric manner.
For more inspiration about the possibilities of computer vision for your industry, check out our Solutions Page to see how we're helping users solve their industry's toughest problems. That's all from us and we can't wait to see what you'll come up with!
If you have more questions, feel free to join our Community Slack to post your questions. If you have troubles building your own model as you fight with CUDA or Tensor Mismatches, simply use our platform, Nexus, to build one in a couple of hours for free!
Build models with the best tools.
develop ml models in minutes with datature